 |
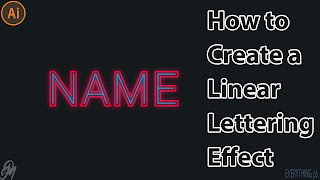
How to create a linear lettering effect | Illustrator tutorial |
Hello everyone, In today tutorial, I will show you how to create this really cool effect, How to create a linear lettering effect in Adobe Illustrator, it is so cool and easy tutorial, you should watch this video with attention, thank you, everyone, I hope you follow us for more tutorial. I wish everyone to participate and follow up to receive all new, You can also communicate with us through our means of communication, and we will respond to your inquiries as soon as possible, thank you all.
➤ Note, In this tutorial, I use the last version of Adobe Illustrator 2020.
➤—Stock:
——➤ IMPORTANT: Any stokes are used for preview and tutorial purposes only. In case you want to use it you need to read the rules from the owners of these stocks. Except for the project file you are free to use it but you can not sell it or demand it as your claim.
Watch tutorial.
First, create a new file.
Then, pick up the text tool and type your ward.
Now, edit your text resize it and choose your font.
In this tutorial, I will use the "Roboto Thin" font.
Make sure that you leave a large distance between letters.
Put your text at the center.
Then, go to "Type"> "Create Outlines" or press "Ctrl+Shift+O".
To switch between Outline/Preview mode press "Ctrl+Y".
Now, go to "Window"> "Swatches".
Then, turn Red and Cyan color to Global Swatches.
Now, zoom in and go to "Object"> "Path"> "Offset Path...".
Check Preview and play with Offest value by up and down arrow keys until you got a good result then click Ok.
Now, go to "Object"> "Ungroup" or Press "Shift+Ctrl+G".
Then, select all-new pieces of offset path that you have created by holding Shift during that.
And make that white.
Now, go to "Object"> "Arrange"> "Send to back" or press "Shift+Ctrl+[".
Now, select all of that white lettering by holding Shift again.
Then, again go to "Object"> "Path"> "Offset Path...".
And use exactly the same setting again.
Then, go to the Swatches panel and apply the second red color.
Now, again go to "Object"> "Arrange"> "Send to back" or press "Shift+Ctrl+[".
Now, select all of that white lettering by holding Shift again.
Then, go to "Object"> "Compound Path"> "Make" or press "Ctrl+8".
And do the same for Red.
Now, select the white lettering and hold Shift and select the red lettering.
Then, go to "Window"> "Pathfinder" or press "Shift+Ctrl+F9".
Now, select your text and go to "Object"> "Ungroup" or press "Shift+Ctrl+G".
Then, select each lettering individually and group it and adjust the distance between lettering as you like.
Now, from "Global Swatches" you can change the lettering color.
Now, grab "Rectangle Tool" or press "M" and draw a rectangle.
Then, change its color to dark.
Now, again go to "Object"> "Arrange"> "Send to back" or press "Shift+Ctrl+[".
Then, go to "Object"> "Lock"> "Selection" or press "Ctrl+2".
Now, group the text again from "Object"> "Group" or press "Shift+Ctrl+G".
Then, select the text and go to "Edit"> "Copy" or press "Ctrl+C".
And again go to "Edit"> "Paste in place" or press "Shift+Ctrl+V".
Now, go to "Effect"> "Blur"> "Gaussian Blur...".
Then, check the preview and play with the Radius value as you like.
Now, again go to "Effect"> "Document Raster Effects Settings...".
Then, make the Resolution "High (300 ppi)", Background "Transparent" and Add "200px" then hit Ok.
Here we go we are done thank you for your visit see you soon in the coming tutorial.
How to download from links.
Project file.


1 Comments
Awesome effect!
ReplyDelete