 |
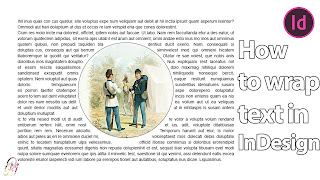
How to Wrap text | Adobe InDesign tutorial |
Hello everyone, In today tutorial, I will show you how to create this really cool effect, How to wrap text in Adobe InDesign, it is so cool and easy tutorial, you should watch this video with attention, thank you everyone, I hope you follow us for more tutorial. I wish everyone to participate and follow up to receive all new, You can also communicate with us through our means of communication, and we will respond to your inquiries as soon as possible, thank you all.
➤ Note, In this tutorial I use the last version of Adobe InDesign 2020.
➤—Stock:
——➤ IMPORTANT: Any stokes are used for preview and tutorial purposes only. In case you want to use it you need to read the rules from the owners of these stocks. Except the project file you are free to use it but you can not sell it or demand it as your claim.
➧ Photo by Boston Public Library on Unsplash.
➤ Steps :
- First go to Create new.
- Then from Web choose "A4" and go to Orientation and choose "Landscape".
- Then click Create.
- Now go and pick up "Type tool" or press "T".
- And make text box.
- Go to "Type" > "Fill with placeholder text".
- Now choose your font and size your text.
- Press "W".
- Pick up "Ellipse Tool" or press "L".
- Draw a circle and Keep pressing "Shift" during the drawing.
- Now give the circle a color and put it at the center.
- Then go to "Window" > "Text Wrap" or press "Ctrl + Alt + W".
- Select the Ellipse.
- Now choose "Wrap around object shape".
- And from "Wrap options" > "Wrap to" > "Both Right & Lift Sides".
- And make offset from all sides 7.
- Pick up "Type Tool" and select your text by pressing "Ctrl + A".
- Go to "Window" > "Type & Table" > "Paragraph" or press "Ctrl + Alt + T".
- From "Paragraph" > uncheck "Hyphenate" and choose "Justify with last line aligned left".
- Pick up Selection Tool" or press "V" and select your shape.
- Then go to "File" > "Place" or press "Ctrl+D".
- And select your image and make sure you are checking "Replace Selected Item".
- Go and pick up "Direct Selection Tool" or press "A".
- Now resize your image.
- From "Transform" play with "Width & Height" values using arrow keys.
- Then export your image by going to "File" > "Export" or press "Ctrl+E".
- Here we go we are done.


0 Comments